
Create a Resource Group
You can create a resource group if you have the following permissions in Polaris System Administration (web-based):
-
Resource Groups: Access
-
Resource Groups: Create
For more information about system administration permissions, see System Administration Permissions Reference.
To create a resource group
-
On the Polaris System Administration (web-based) Home page, select Resource Groups.
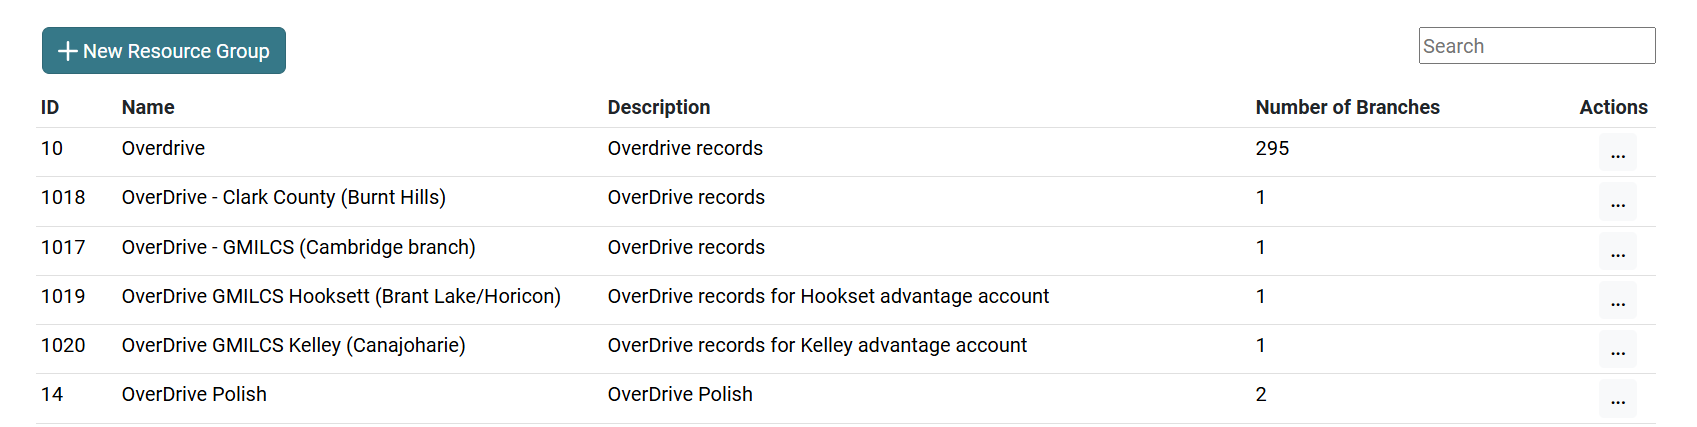
The Resource Group page appears, with a list of resource groups. Each resource group is listed with an ID, Name, Description, and Number of Branches.
-
Select New Resource Group.
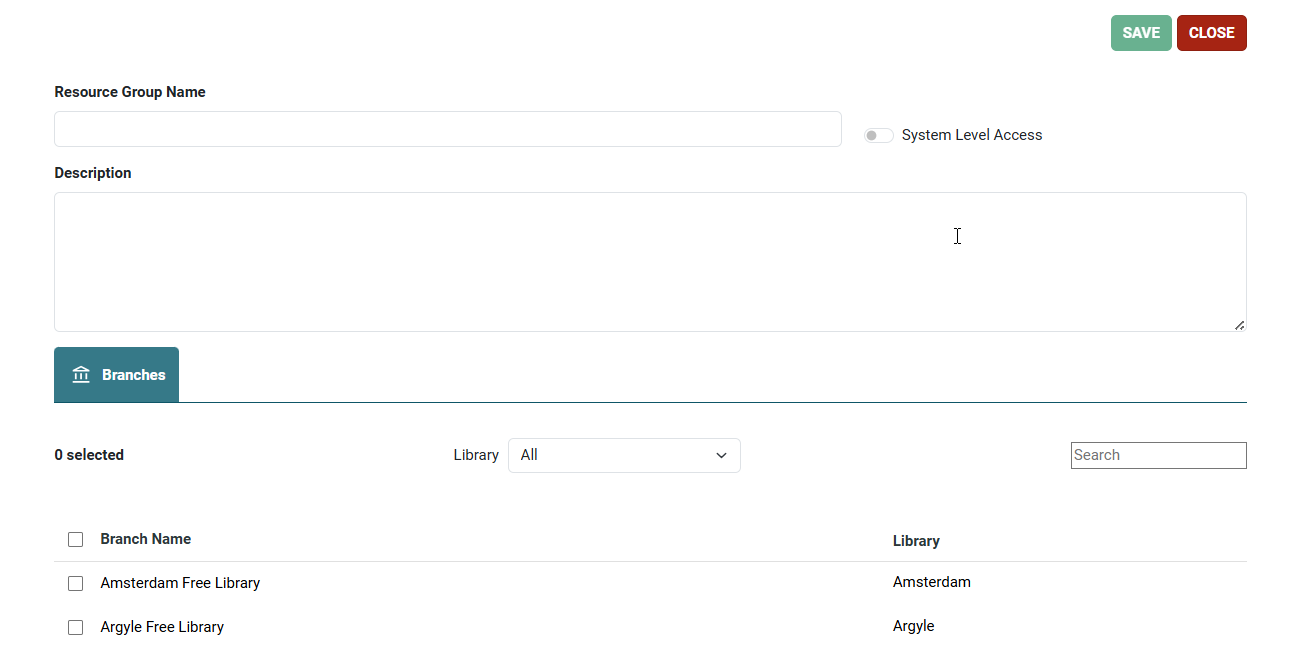
A Resource Group workform appears.
To create a Resource Group
-
In the Name field, enter a unique resource group name.
-
(Optional) Turn on the System Level Access toggle to give PAC users access to the resources associated with this Resource Group when the PAC connection organization is the system.
-
In the Description box, enter a description of the resource group.
-
From the Branches tab, do following:
-
Select the Branches checkbox to select all branches. Resources which this Resource Group is associated with are available when the PAC connection organization is any library-level organization or any branch-level organization.
or
-
Select the checkbox next to a branch name to select specific branches. In the Library dropdown list you can select a library to filter the list of branches to only those associated with the selected library. You can also filter the list of branches by typing in the Search box. The number of branches selected is displayed in the upper-left corner of the Branches tab. PAC users connected at any of the selected branches have access to the resources (databases) associated with the resource group.
-
To remove a branch from a Resource Group, clear the checkbox next to the branch name.
-
-
Select SAVE.
